| CUTSCENE TUTORIAL 2 AUTHOR: KENGO DATE: 25/11/02 |
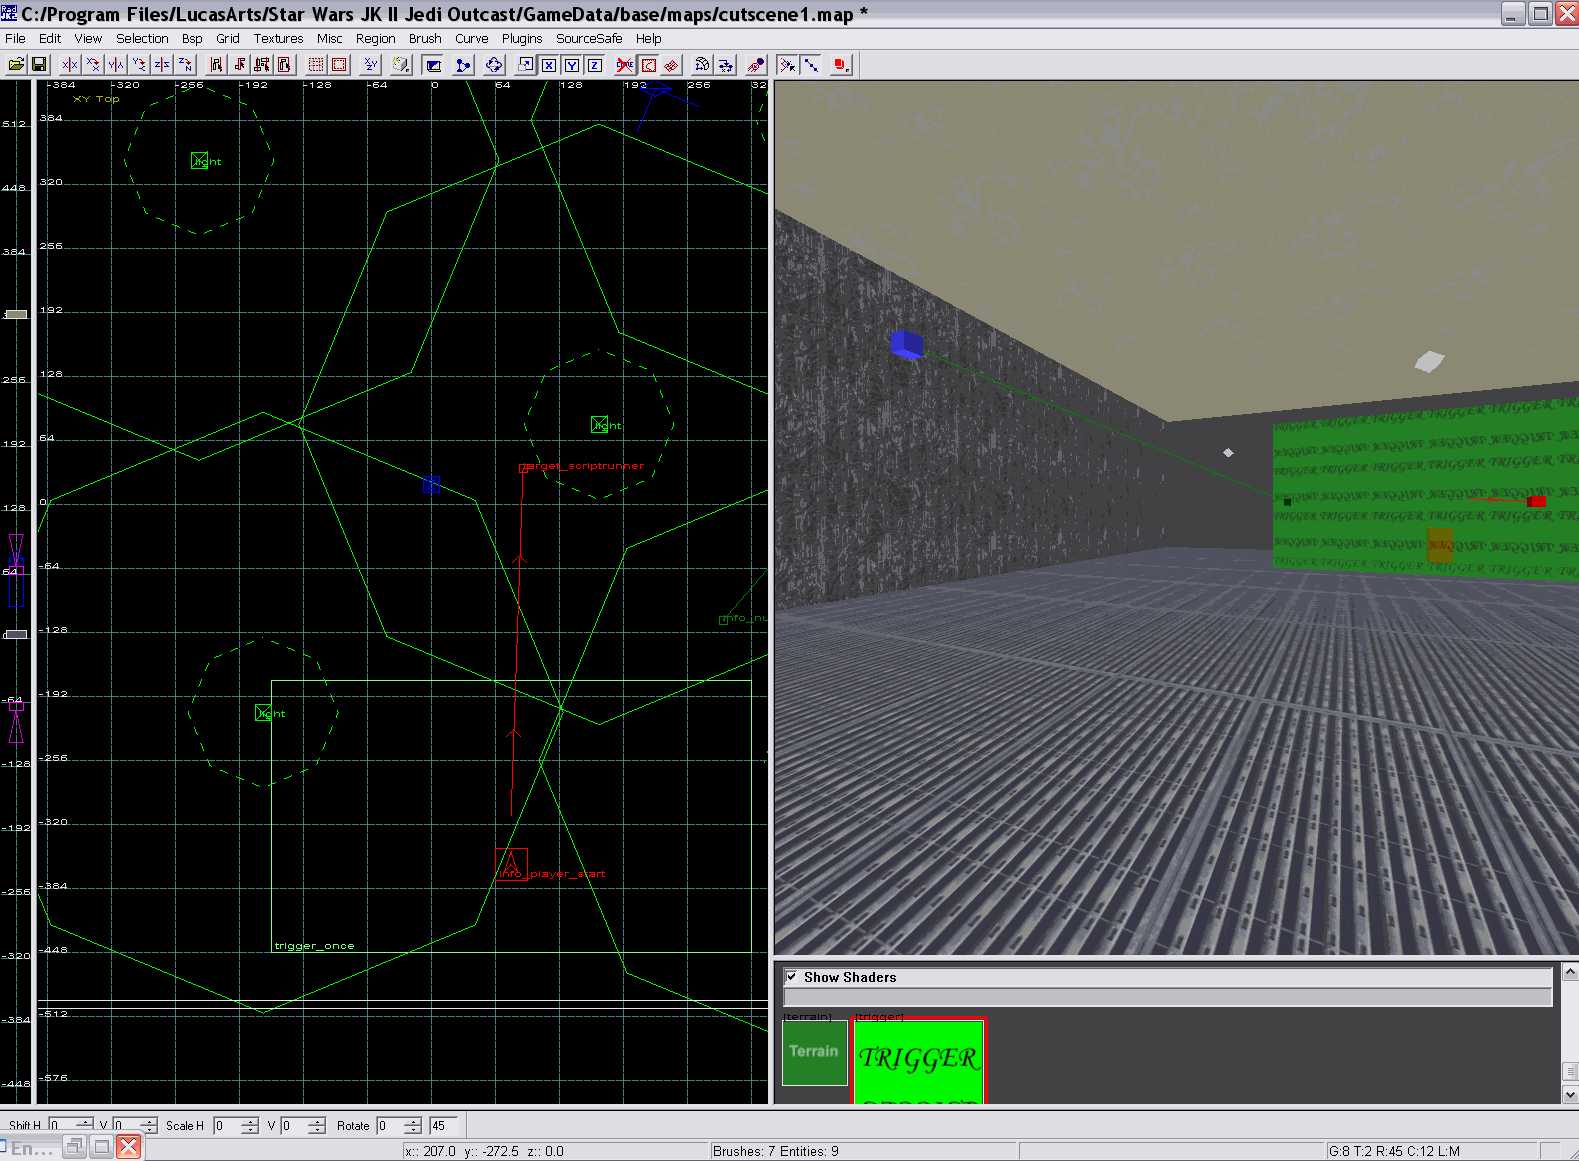
| Now we have the programs set up correctly. The next step is to set up a simple working cutscene, once you have mastered this the rest should follow fairly naturally. Create a basic room in Radiant. Remember to include an info_player_start, a few lights. Now to add the things that are required in Radiant for cutscenes. Firstly, cutscenes are controlled, and initiated, by scripts created with BehavEd. To trigger them, we need a trigger in Radiant. These triggers should fire a target_scriptrunner. Create a trigger (remember to give it the trigger texture so it isn't solid in-game, make it a trigger_once. Create a target_scriptrunner. Now select the trigger, then the target_scriptrunner. Press Control-K, this will link the two entities (it is important to select the trigger first and the target second as that will create the direction of the link between the two ie the trigger fires the target.) Make sure the trigger is around the info_player_start, so the Cutscene will trigger as soon as the level loads. Go to the entity settings for the target_scriptrunner. For the Key field enter Usescript, for the Value field enter cin/cin1 Next we need what can essentially be considered the cameras within the game. Create a ref_tag. For the key type targetname and for the value make it cam1. To point the ref_tag (AKA the camera) you can either use the directional arrows that you use to alter the facing of NPCs, but a far more accurate way of choosing the angle is to target the ref_tag at an info_null. Create an info null, then deselect it, select the ref_tag then the info_null and press Control-K. This will target the ref_tag at the info_null. The camera will basically point from where the ref_tag is to where the info_null is, so position the info_null pointing into the room and the ref_tag near the edge of the room. Believe it or not, that is all you need in Radiant to create a very basic cutscene! Save the map and name it, I've called mine cutscene1. Run a BSP on the map. The map itself is ready, now you need to create the script itself. Open BehavEd. You will see one item in the scriptflow area called rem. This has nothing to do with the excellent alt-rock band, as you may have guessed. Basically, the rem command is there to name the script to remind scripters exactly what the script is for at a glance. It really doesn't matter when you've only got a couple of scripts but clearly would be more vital if you had hundreds! I just delete the rem command myself, it doesn't matter really. First add a camera command by double clicking on the camera command symbol to the left of the program. It should say ( <CAMERA_COMMANDS> ENABLE ) to the right of the camera symbol and the word camera. If you doulbe clock on the symbol and that line within the Script Flow area you will bring up the Event Editor screen, basically a small submenu that allows you to alter aspects of each command. In this case you will see a pull down menu. If you select it you will see that the options for this command are ENABLE, DISABLE, ZOOM, MOVE, PAN and so on. Leave this option as ENABLE and then press OK. This is the command that turns camera mode on, moving the game into a cutscene. Create a second Camera command by again double clicking the symbol to the left of the program. Or you could select the already present Camera command in the Script Flow area and then select Clone in the options to the right of the program, or select the command in the Script Flow area and press the space bar to clone it. Double click on this second Camera command in the Script Flow area. Select MOVE from the drop down menu of options, then click Re-Evaluate. This will alter the various options you have avaliable to alter for this command. There should be three boxes, the one to the left has MOVE in it, the one to the middle should have numbers. These numbers are co-ordinates, but don't worry, you don't need to use these. Instead click the Helper button next to the middle box. Some more options should appear, a drop down menu with a Get button next to it, and another drop down menu with a Tag button next to it. Press the Tag button. The following should appear in the middle box: tag("targetname", ORIGIN). Delete the word targetname between the speech marks and put in the word cam1 in it's place. This has designated the ref_tag named cam1 in Radiant as the camera to be used in this cutscene. The MOVE command is about where the Camera is. Create another Camera command, don't clone the one you have just altered, the MOVE command one. With the new Camera command double cloick it to bring up the Event Editor, go to the drop down menu and select PAN, then go to Re-Evaluate. The PAN command is about which way the Camera is facing. Again go to the Helper button next to the box second from the left, then click the Tag button that appears. In the box next to the Tag button you will see the word Origin displayed in a drop down menu. Go to the menu and select ANGLES. Press the tag button again and you will see the text in the box second from the left change to tag("targetname", ANGLES). Replace targetname between the speech arks with cam1. You have now specified that the angle used for this camera will be the angle that cam1 has (the direction it points towards the info_null it is linked to). If you double click again on both the <CAMERA_COMMANDS> MOVE and <CAMERA_COMMANDS> PAN commands, you will see the box to thr right is set to 0. This box determines the amount of time that the action takes to complete. Now later this will become more important, as it affects how long it takes for a camera to move from one place to another, how long it takes to change to face a different direction. For the time being we will leave the number as 0 in both commands. Now we have to include a Wait command. Double click the wait command to the left of the program. Double click on the wait command in the Script Flow area. The default number in the only box in the Event Editor as you see is 1000. This is 1000 milliseconds, ie 1 second. Change this to 8000 and go to OK. You will see that in the Script Flow area the number in brackets next to the wait command symbol has altered to 8000. Create another camera command. In the drop down box in the Event Editor select DISABLE. If you do not have a disable camera command at the end of the script then the game will not come out of camera mode even when all the other actions are completed, and the only way to get out of the game is to shut it down manually. Now the script is complete and should look as in the picture below. Go to the Save As command to the right of the program and save the script in the subfolder within scripts that you created (in this tutorial the cin folder). Now you have the script saved, but only in text form. To convert it to a program as well you need to run the compile. The button for this is located in the bottom right of the program. Compile times are nothing like for maps, it should only take a few sceonds maximum. The script is now completed and compiled. The script should enable the camera at the position of cam1, facing the dirction cam1 is pointing. The game should wait in camera mode for 8 seconds from the position and facing of cam1, then come out of camera mode again. With the script and map compiled you can now make sure everything is working. Below is a picture of how the script should look. Load up JK2 and bring down the console (shift and the key to the left of the 1 key). Type devmap mapname (in this tutorial the map is called cutscene1) so I would type devmap cutscene1. The map should load, and as soon as it does the cutscene should run. Congratulations, you have completed your first cutscene in JK2! If you have any problems go back through the tutorial again and make sure you have done everything correctly. If you still can;t get it working after a good checking then feel free to email me. |
 |
 |
 |