| CREDITS TUTORIAL AUTHOR: KENGO DATE: 07/02/02 |
| A lot of credit for this tutorial goes to Darth Arth, whose Return to Jedi Valley pk3 I scavenged to find out where the credits.sp folder was and what you did with it! Credit also to JK2 Mapping by 007 for giving me my first insight into how you do scripting with BehavEd |
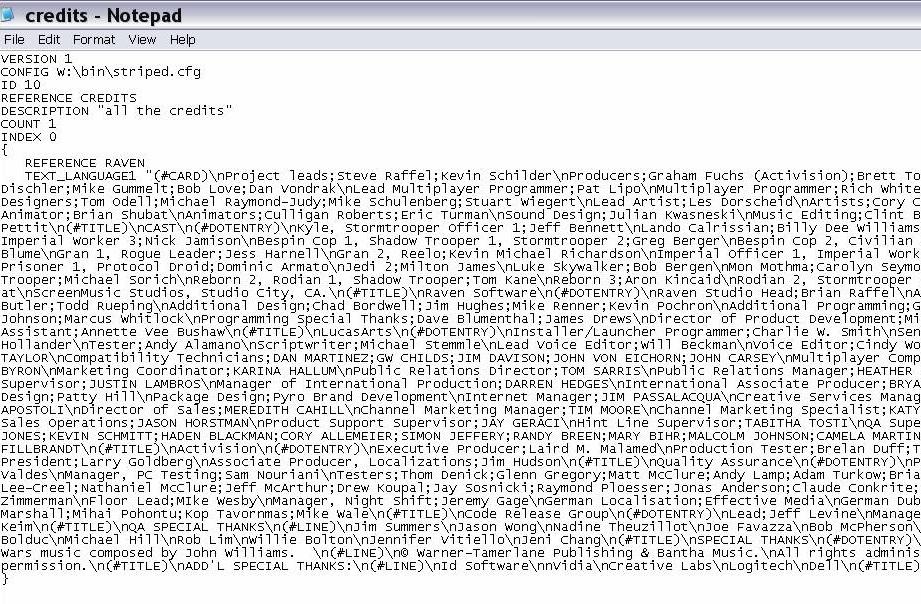
| Note: Before using this tutorial, I suggest you read the first 3 camera tutorials if you haven't already to familiarise yourself with using BehavEd and saving scripts. First of all, open up the assets1 pk3 file in the base folder of Jedi Knight 2. Set path in alphabetical order, then look for the extension 'strip' in the path section. Then look for the credits.sp file. Extract it to the desktop, a folder called 'strip' will appear on the desktop, and the file credits.sp will be in the folder. You can open the folder using notepad. Below is a screenshot of what you'll see: -------------------------------------------------------------------------------------------------------------------------------------------------------- \n starts a new page on the credits The word appearing just after the \n will be in CAPS near the top of the screen when the credits run To end the words in caps and have words below in normal font, put a ; Words after this on that page of credits will not be in caps After a ; the next words will be on a new line TEXT_LANGUAGE1 "(#CARD) - the beginning of the credits - leave this There are " marks at the beginning and the end of the credits - leave these. REFERENCE_RAVEN is above TEXT_LANGUAGE1 - leave this Leave the { above and the } below the credits After the last entry there should be \n, which goes just before the " at the end -------------------------------------------------------------------------------------------------------------------------------------------------------- So for instance: TEXT_LANGUAGE1 "(#CARD)\nSuperheroes; Spiderman; Superman; Green Lantern\nSupervillans;Joker;Dr Octopus;Lex Luther\nSidekicks; Robin\n " Would create the following screens in the credits: The credits will automatically resize the fonts depending on how much is on each page, so if there were 10 superheroes listed on the first page, the font would be a lot smaller than if there were only 3. Don't try to fit too much on each page or people won't have a chance to read it all! -------------------------------------------------------------------------------------------------------------------------------------------------------- Create some custom credits so you will be sure that they have worked when you use them in a level. If you haven't read the tutorial on SP PK3s and created the SPMod folder yet, then go there before reading on. Now copy the altered credits.sp inside the strip folder into the strip folder already in the SPMod folder (if there isn't one, just copy the whole folder across with the credits.sp inside) to the SPMod folder Load up Packscape, load the SPMod PK3, copy all the folders in the SPMod folder to the SPMods pk3 (but don't copy the SPMod PK3 already there into the SPMod pk3), then save it to the SPMod folder again This has basically updated the pk3 so that the altered strip folder is now in it. -------------------------------------------------------------------------------------------------------------------------------------------------------- Now load up Radiant. Create a test map, for these tutorials we will call it creditsmap As explained in the camera tutorials, create a trigger once which links to a target_scriptrunner. For the target_scriptrunner enter: Key: Usescript Value: map/credits1 Make sure the map has an info_player_start and some lights. Save and compile the map. Now go to base/maps and find the bsp of creditsmap, copy and paste it into the maps folder in the SPMod folder (if there isn't already one, create a maps folder in the SPMod folder). -------------------------------------------------------------------------------------------------------------------------------------------------------- Now load up BehavEd. Create a new script and save it as credits1. in the map folder in base/scripts. Create a set command. Double click on it, and in the left box scroll through the options until you find SET_CLOSINGCREDITS, which is very near bottom of the list. Leave the right hand box. Go to OK. Save and compile the script. Now go to base/scripts/map, find the IBI file for credits1. The IBI file is the script, the txt file of the same name is just so you can easily read what the script does.Copy the IBI file of credits1 (I like to copy the txt files too to keep them together, but that's optional) into the map folder in the scripts folder of the SPMod folder. Now open PakScape, open the pk3 of SPMod. Copy all the folders in the SPMod folder (but not the pk3 file) into the pk3 of SPMod, then save it. It is now updated with the custom map and custom script. Now load up Jedi Knight 2, load the SPMod mod. Then using the console load up credtismap. When you reach the trigger your custom credits should start playing. However, these will be playing as the level continues to run. To get credtis fully working, you need to have the game first go into camera mode... -------------------------------------------------------------------------------------------------------------------------------------------------------- (If you have not read the first 3 camera tutorials yet I recommend you do so before continuing as I will assume you have a good basic understanding of camera scripting) Go back to Radiant, and load creditsmap. Make a ref_tag and connect it to a info_null. Create a brush (doesn't need to be huge but needs to fill the screen when viewed by a camera close up) and put a stars texture/shader on it. Point the ref_tag at the brush. Make sure the ref_tag and the brush are outside of the main map. Give the ref_tag a targetname, for this tutorial starcam1. Save and compile the map. Copy the map from the maps folder in the base driectory of JK2 to the maps folder in the SPMod folder. Load up BehavEd. Load the credits1 script. Now include <CAMERA COMMANDS>MOVE and PAN as you would normally for camera commands. Set the time for both of these as 0. Remember to enter the targetname of the ref_tag, in this case starcam1. Set a wait command that lasts at least as long as the credits will to run, as otherwise the map will come out of camera mode and will go back to normal play - with the credits still running! Once the credits have all run, the map will end and the player will go back to the menu screen. If you make the wait command longer than the time it takes for the credits to run, then the credits will end and the player will be brough back to the menu screen as soon as the credits end. So you may as well make the wait command a lot longer than you think the credits will be. You should have the SET_CLOSINGCREDITS command first, then the camera commands, then the wait command. Save and compile the script. Again go to the credits1 script in the base/scripts/map directory and copy it to the map folder in the scripts folder of the SPMod folder. Again open the SPMod pk3 using Pakscape, copy all the folders in the SPMod folder into the SPMod pk3, then save it in the SPMod folder. Now run Jedi Knight 2 again, load the SPMod from the mod menu. Load up the credtismap map using the console. This time when you reach the trigger, the credits should run against a stars backdrop. You could have other backdrops if you want, a screenshot from the map, maybe a distant closing shot - whatever the ref_tag you specified for the credits is pointed at, is what the backdrop will be. |
| SUPERHEROES Spiderman Superman Green Lantern |
| SUPERVILLANS Joker Dr Octopus Lex Luther |
| SIDEKICKS Robin |
 |